3D Printing a New Microphone Case!
So I’m pretty excited to talk about this! It’s different then just working and redesigning a video. I have been using EM258 ultrasonic microphones from micbooster.com. The thing is that, they are just a capsule and a wire. No way to attach them to anything, so for the longest time I attached them with some putty, tack stuff. Which, worked.. but not very gracefully. It wouldn’t let me angle them very well, they’d fall off, it was messy, just all around a hassle to mess with. So, with the recent addition of a 3D printer, I had to do something audio before designing anything else. So when recording, the idea popped in my head.
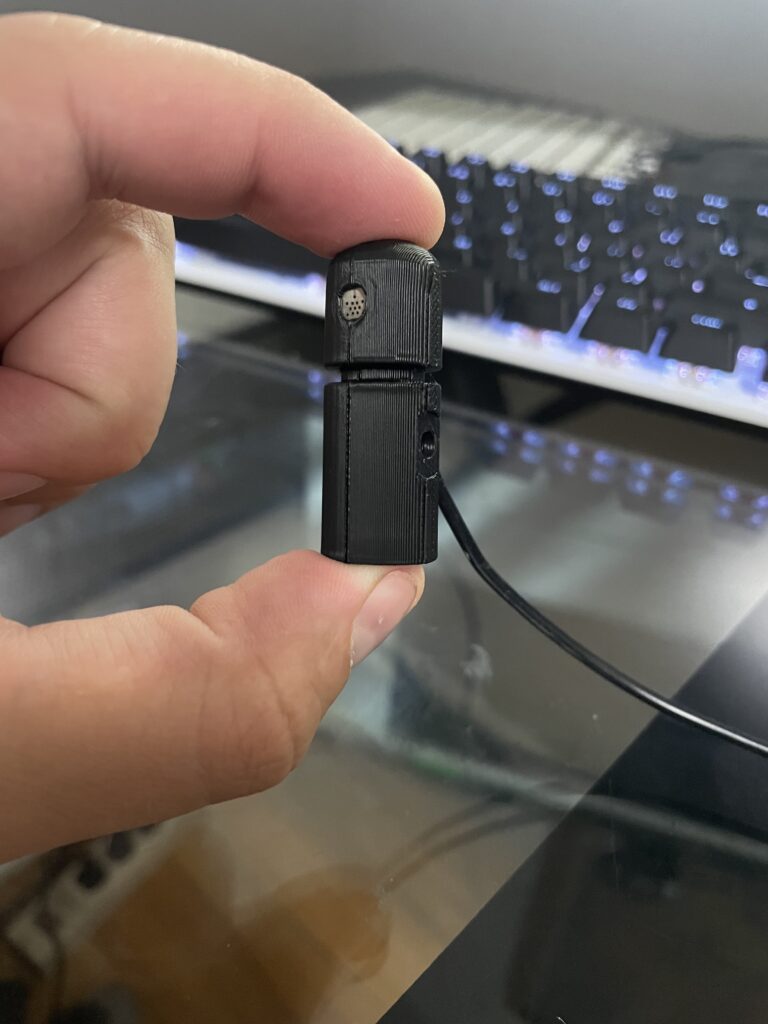
Before I too ahead of myself, pictures!
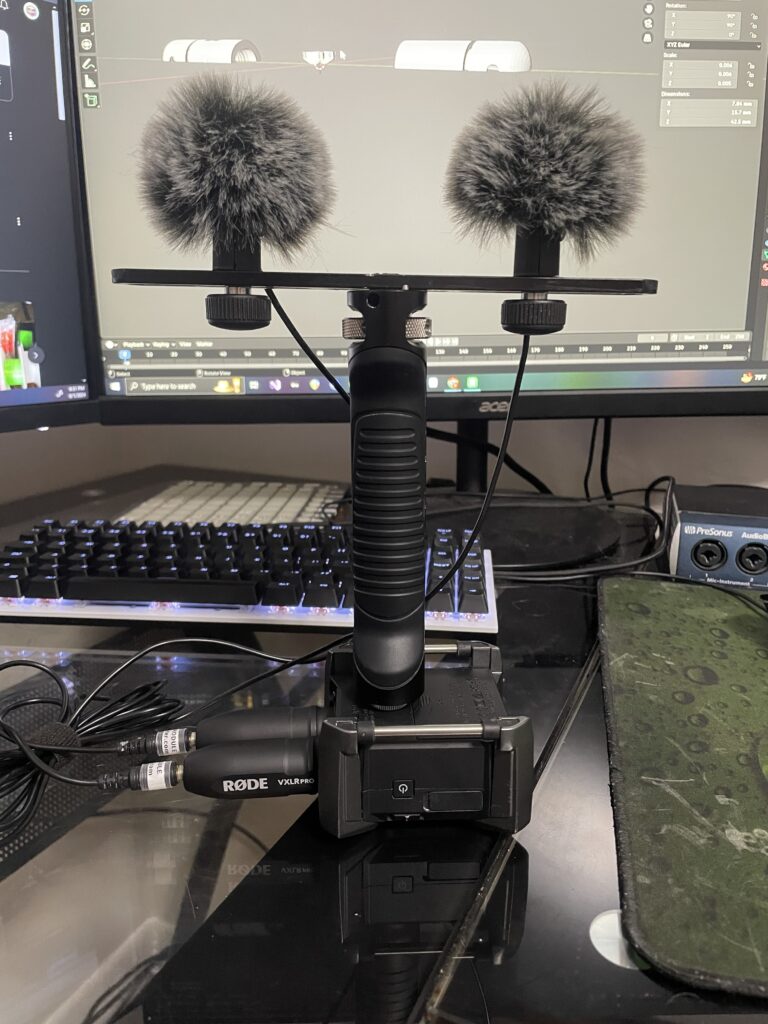
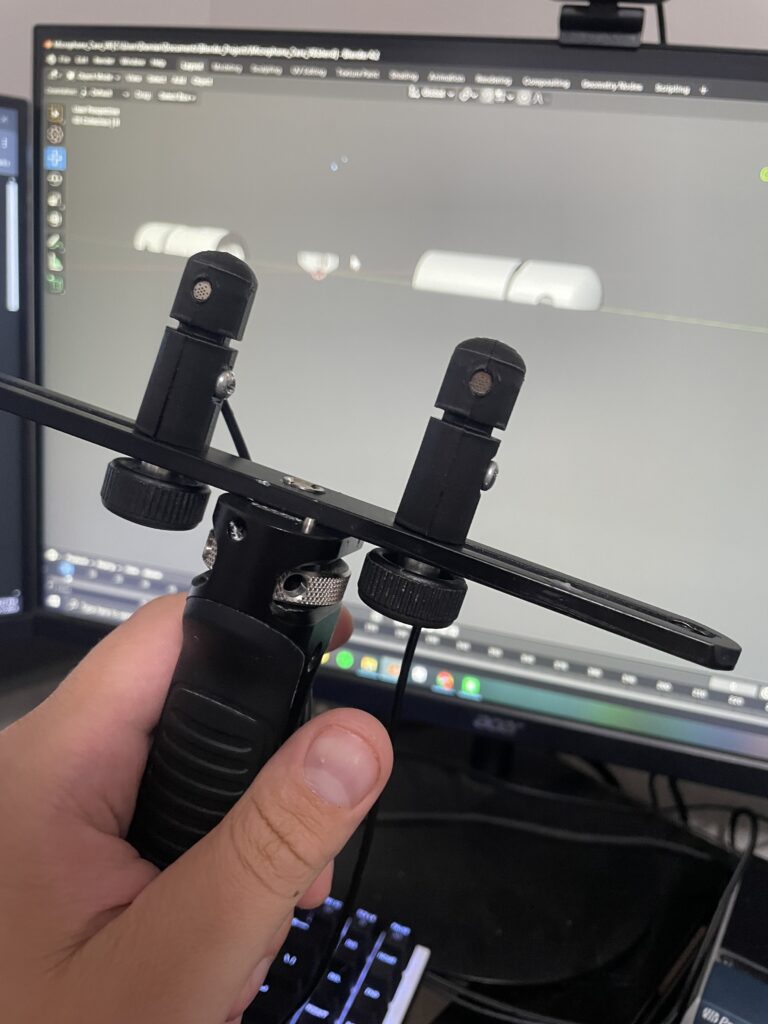
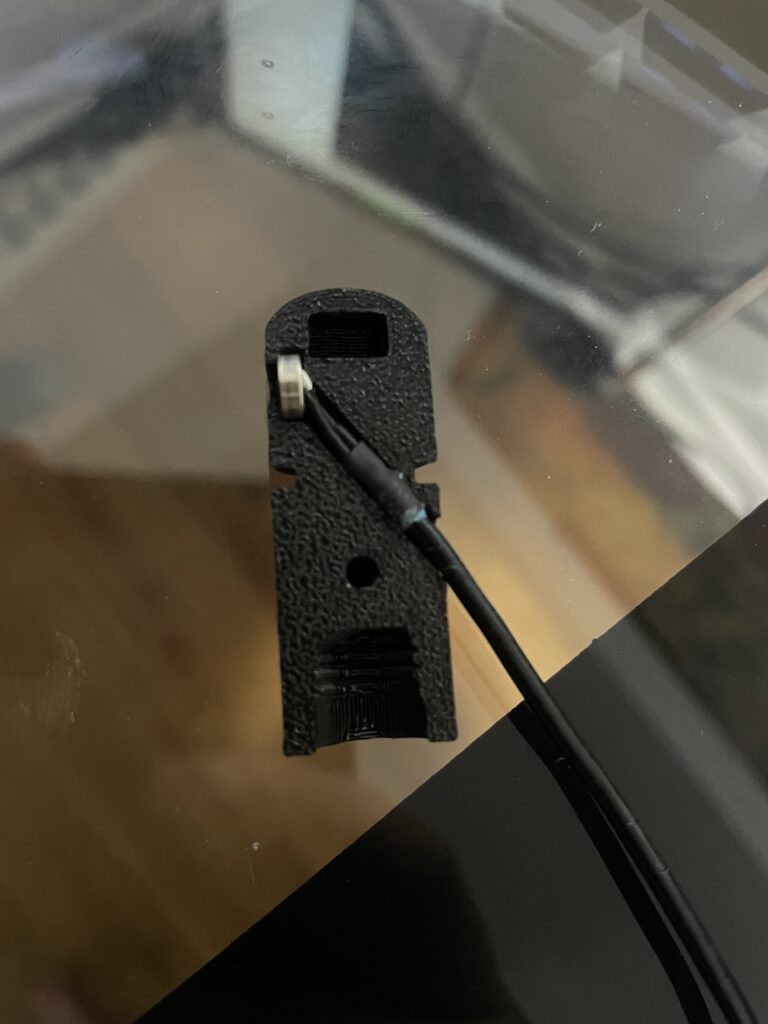
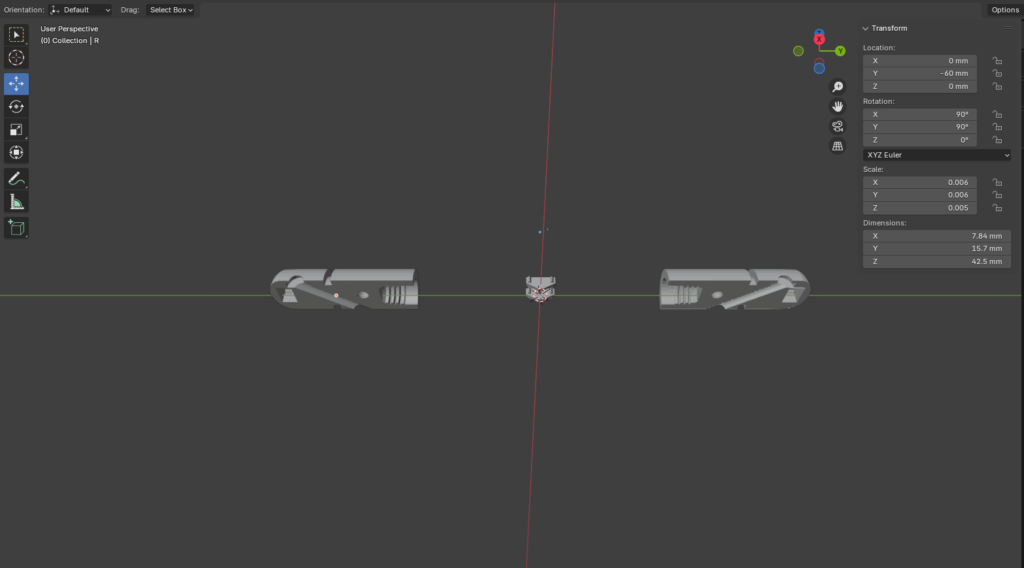
So there’s a few to show a little bit of what i’ve made! It took maybe 3 weeks of learning 3d modeling, and 5 prototypes. It was really fun and feels so fulfilling going from just an idea, to something I not only can hold but also something that serves a purpose.
The functionalities might be self explanatory from the pictures, but incase they’re not I’ll go over them!
There’s a space for the capsule and the wire. The wire comes down from the capsule and out of the back. There is also an indent for the dead cat (wind screen) to sit in. to keep these together, I made a tab system to keep the top together, and a screw to keep the rest in place. Finally, there are threads at the bottom to be screwed in it to be on my mobile recording setup. (which was inspired by David Dumais’ recording setup).
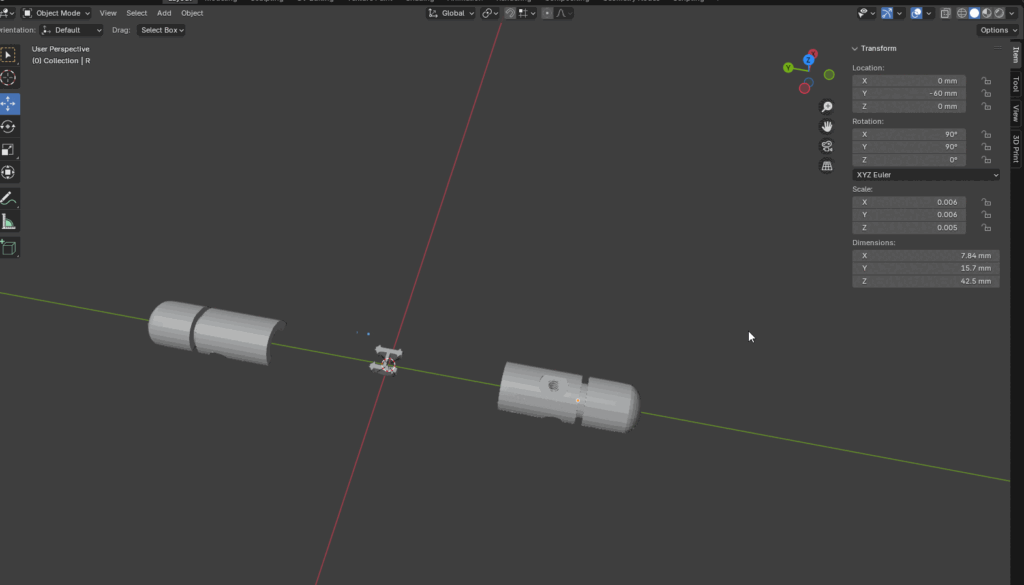
I made the model in blender, which usually isn’t the CAD software many would use, but it’s been a software i’ve wanted to learn for some time. I think I’ll continue to use blender for 3D modeling, because I think transferring those skills will be useful later on.
So there it is! I could go on and on about it because I’m so excited that I successfully made something that works.
Thanks for taking a look!
-Soundwich


One Comment
EEEE
Swag